1
/
of
8
My Store
GENMINI SD STORAGE EX - For Genesis / Mega Drive Mini 1
GENMINI SD STORAGE EX - For Genesis / Mega Drive Mini 1
Regular price
$14.99 USD
Regular price
Sale price
$14.99 USD
Unit price
/
per
Couldn't load pickup availability
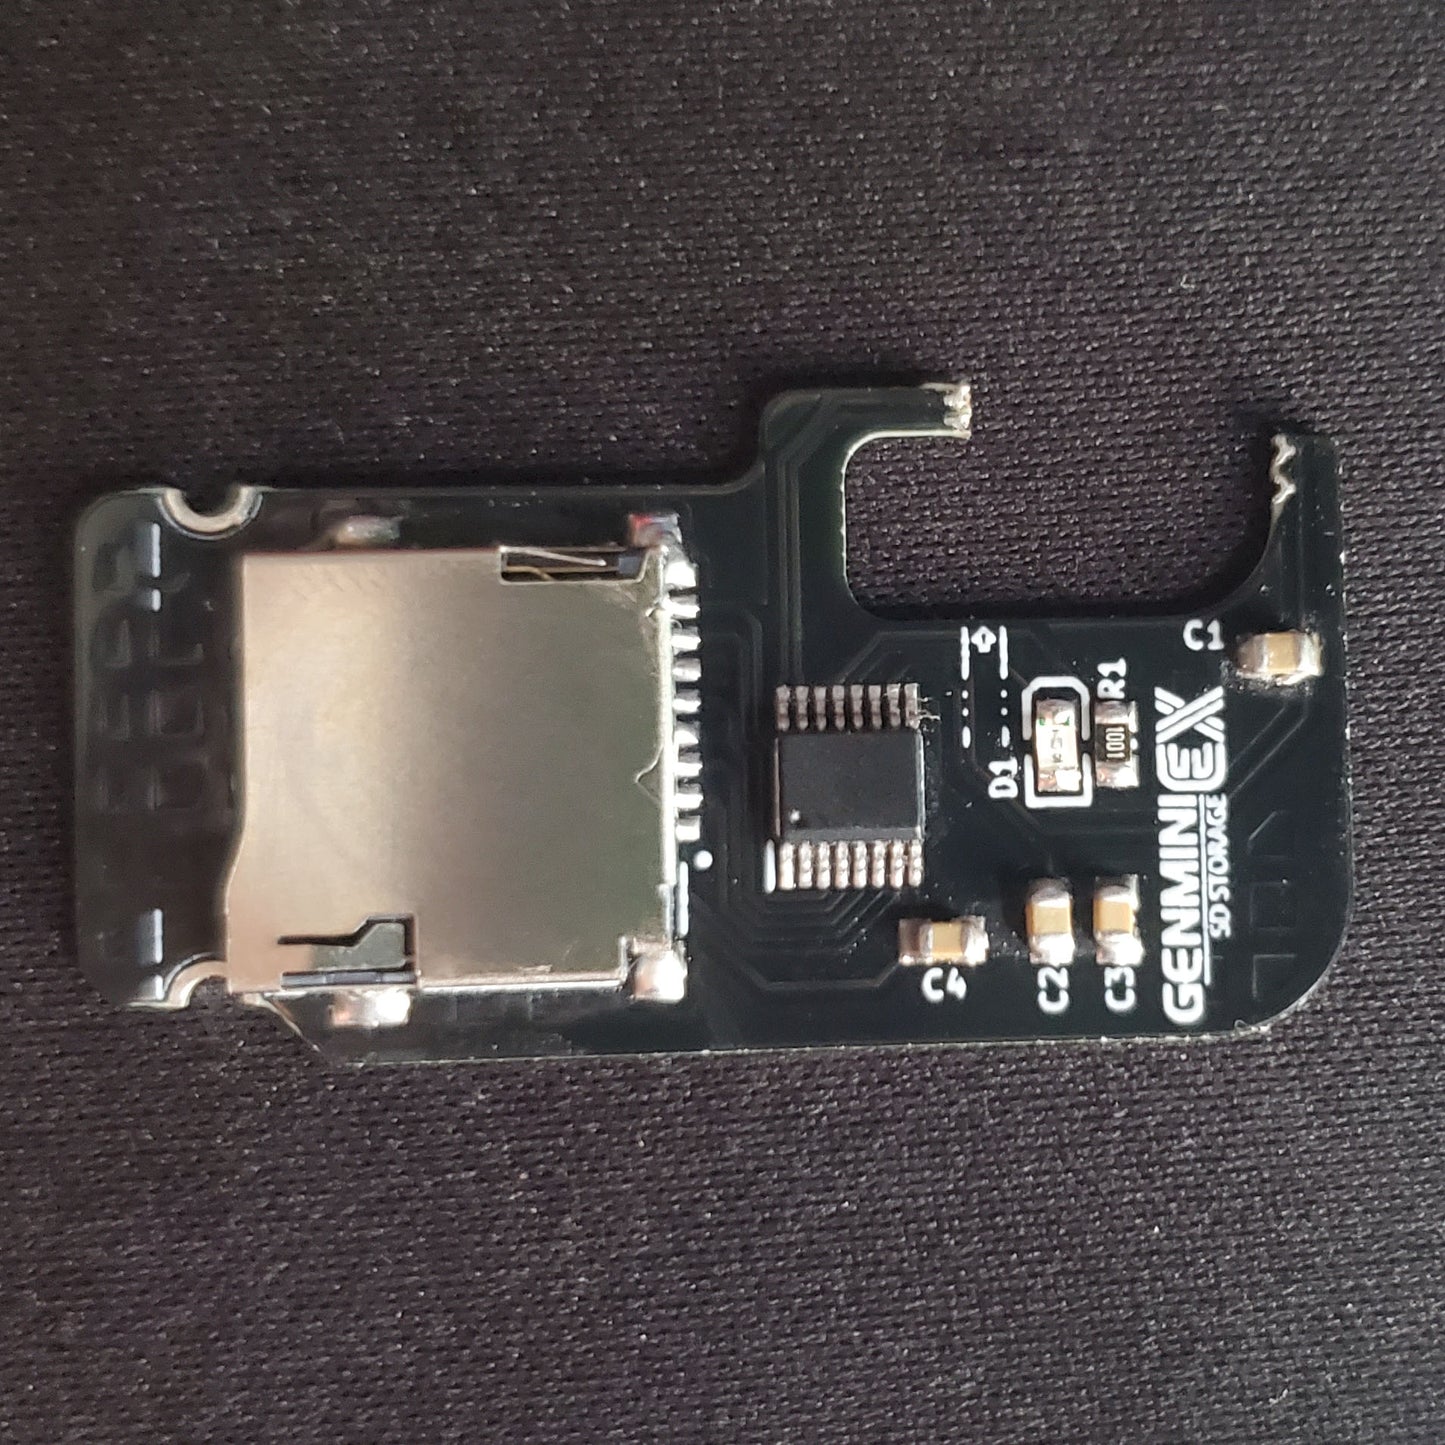
Genesis Mini SD Storage Expansion Board for Genesis/MegaDrive Mini 1
The Genesis Mini SD Storage Expansion board allows for you to expand the internal storage of your Sega Genesis mini or Mega Drive mini with a microSD card size of your choice when used with Hakchi.
The installation is an intermediate installation. It is HIGHLY recommend you have flux, kapton tape, decent solder wire (the higher quality the better), and a way to magnify such as a magnifying glass with good lighting or a digital microscope.
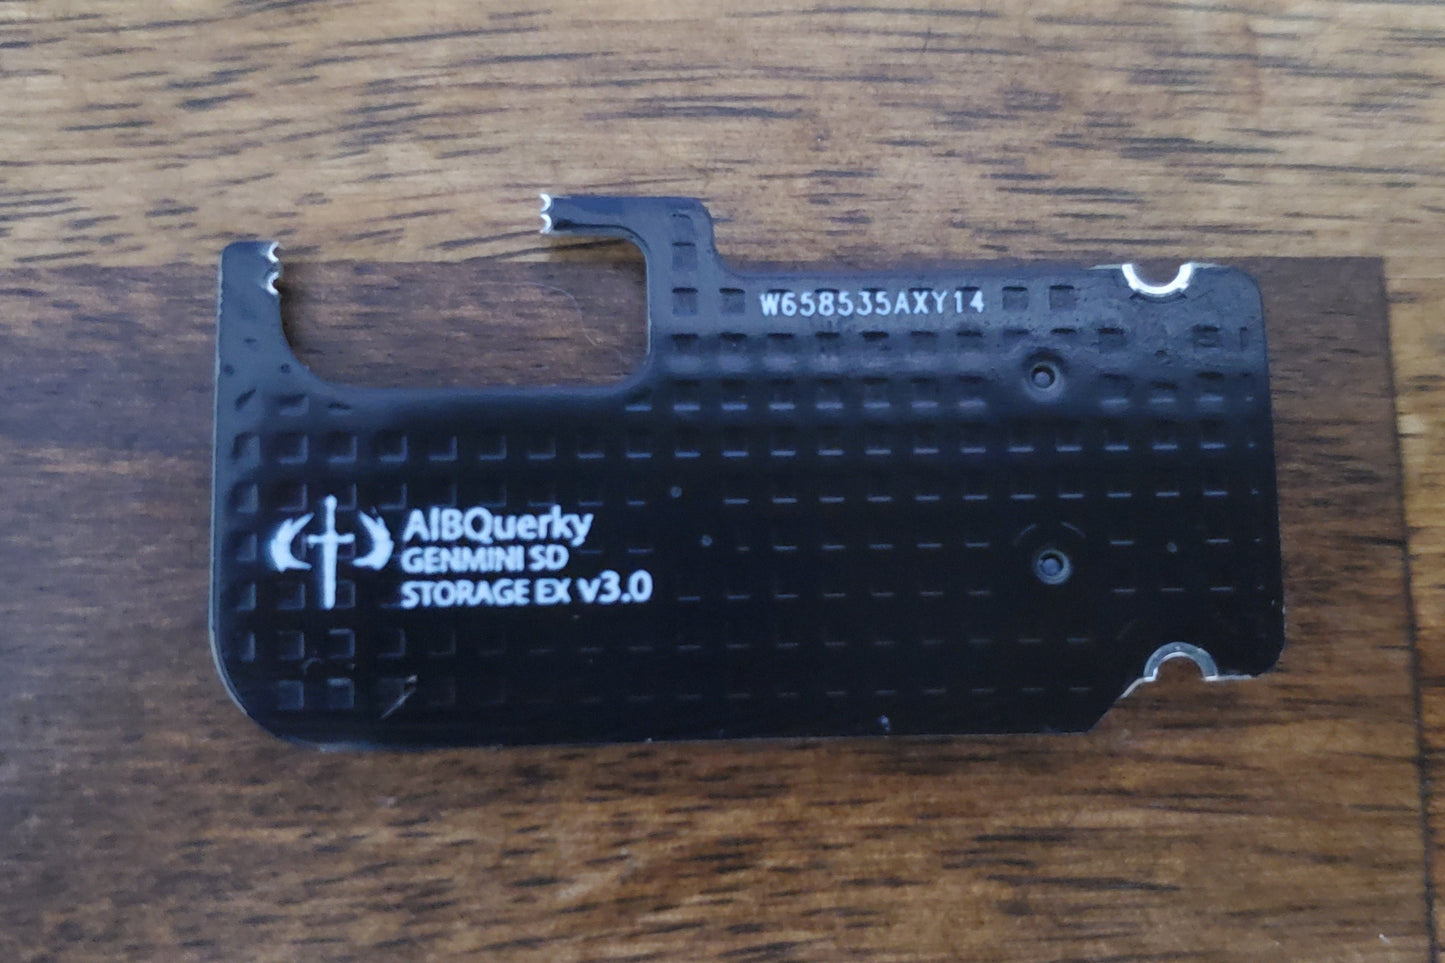
Board Installation Instructions:
1: Turn the board with the USB ports facing away from you.
1: Turn the board with the USB ports facing away from you.
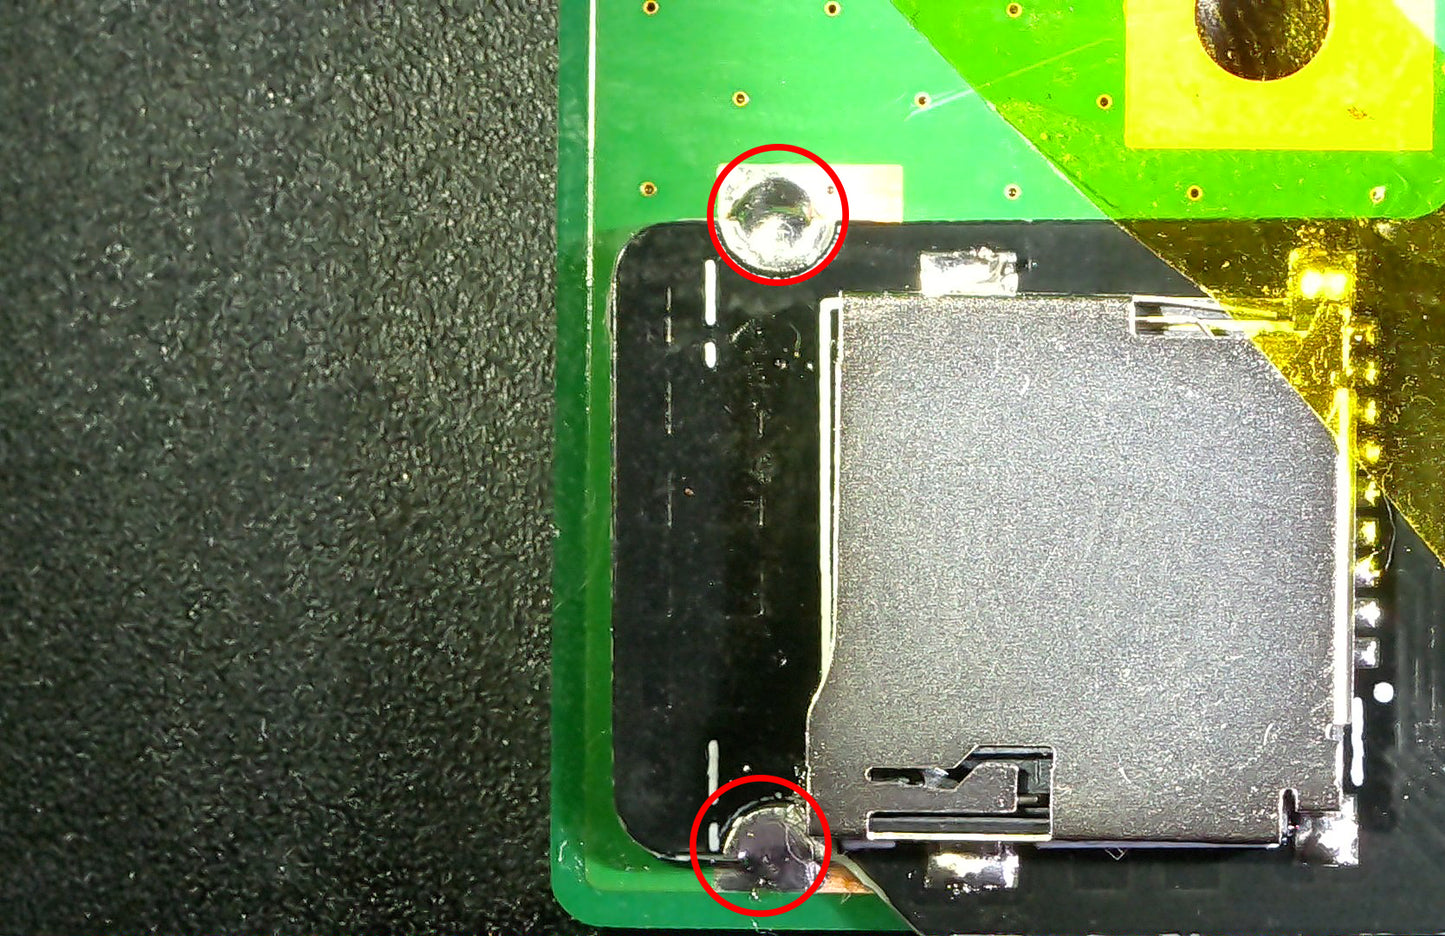
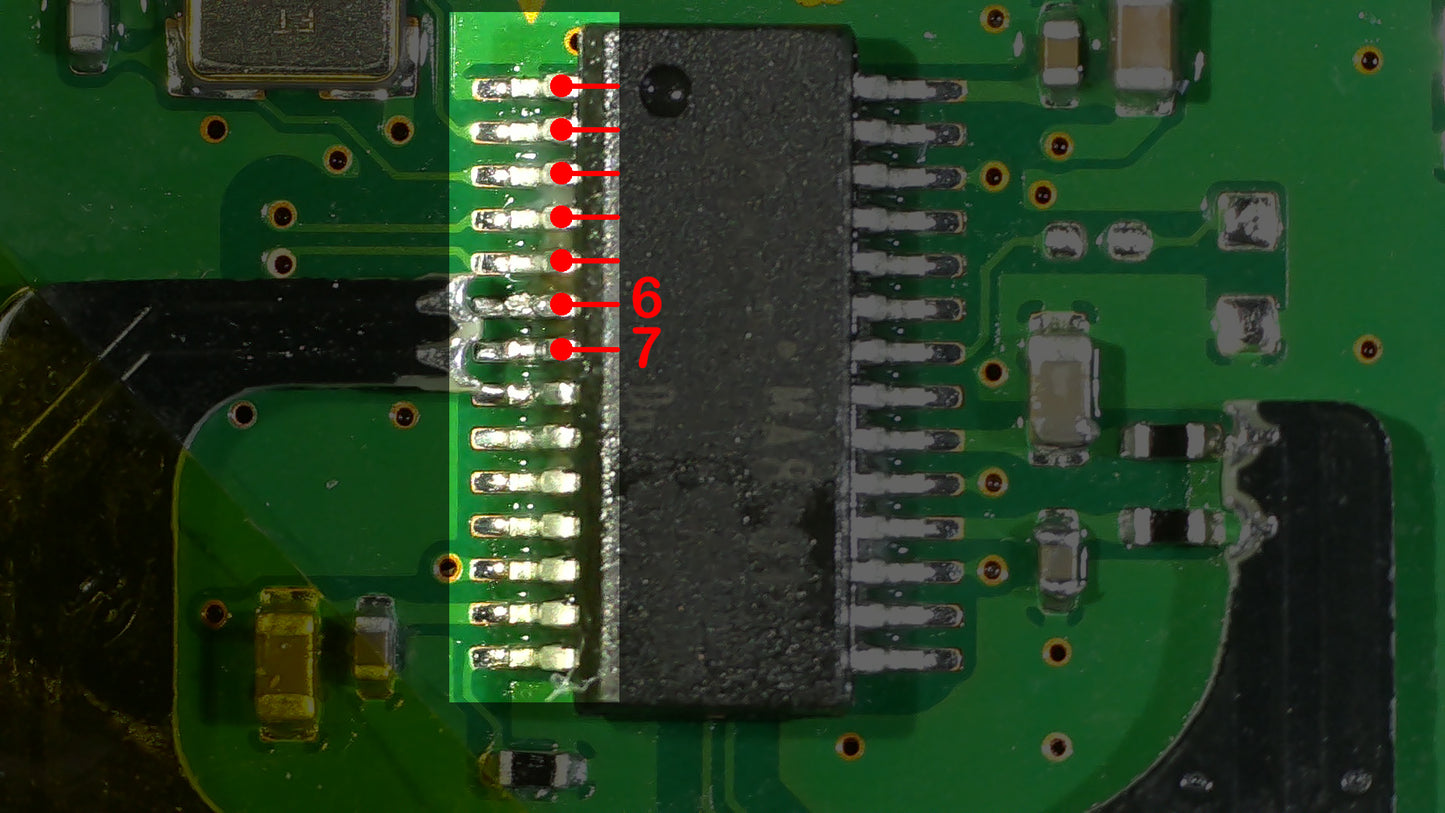
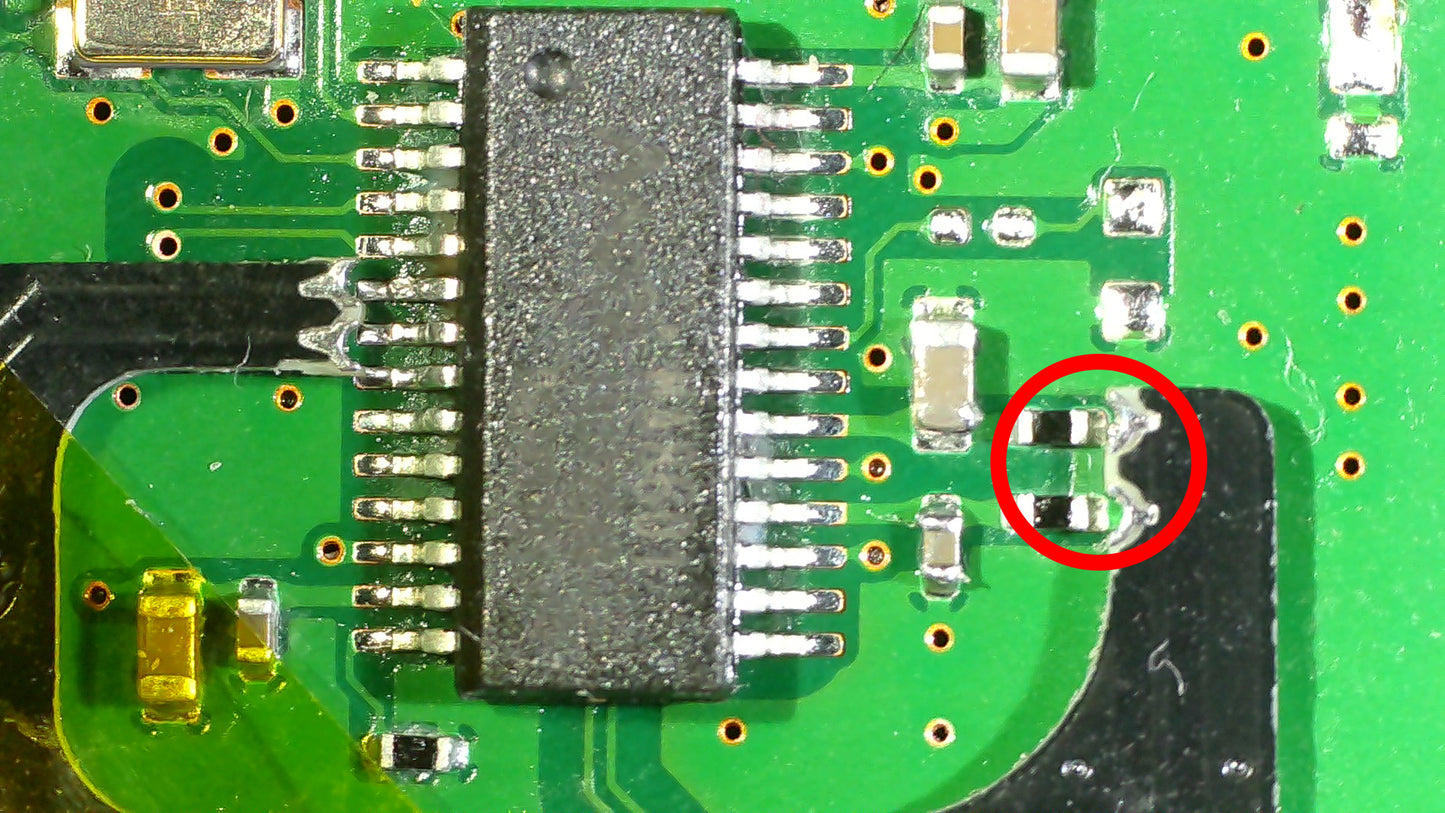
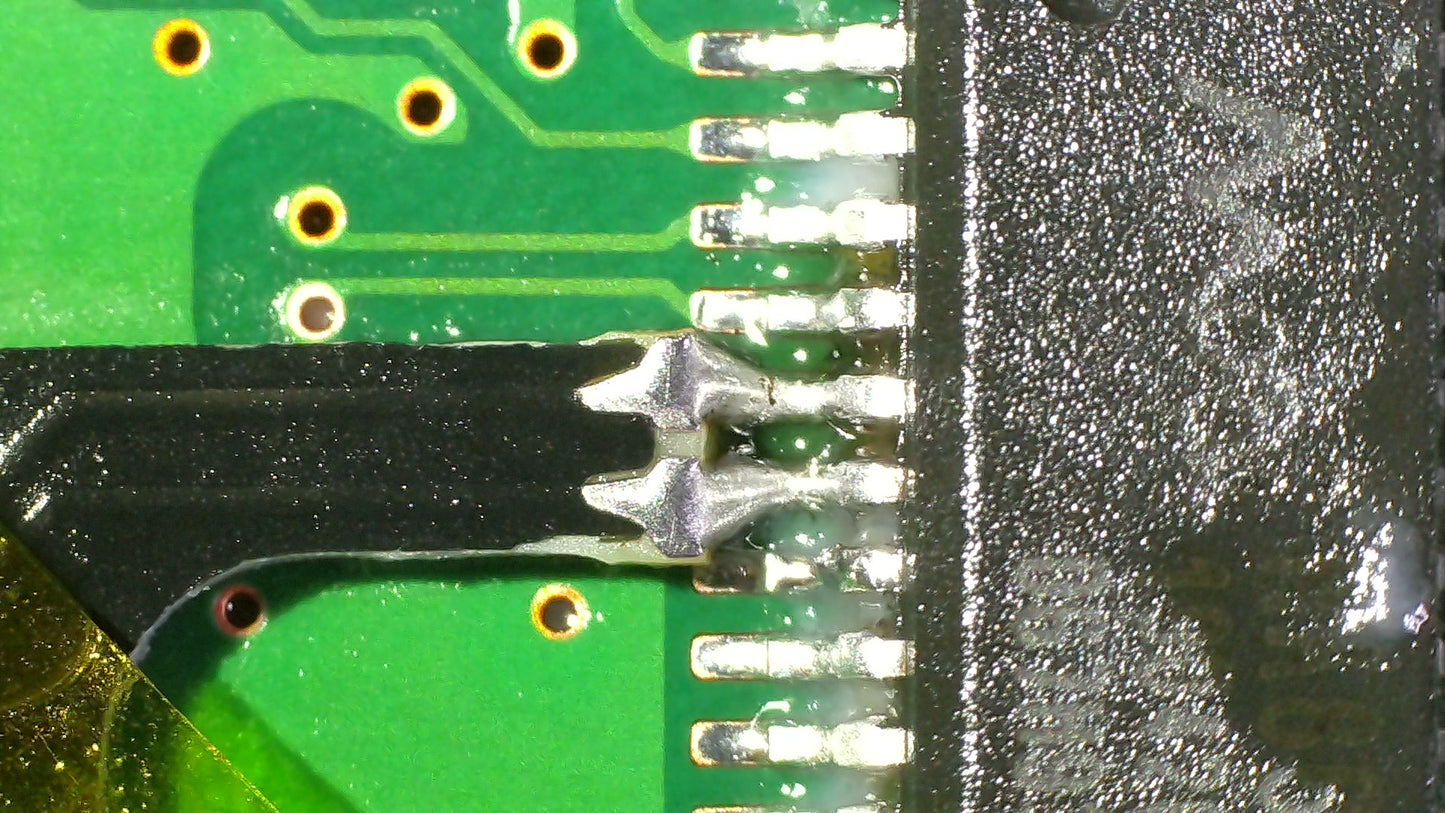
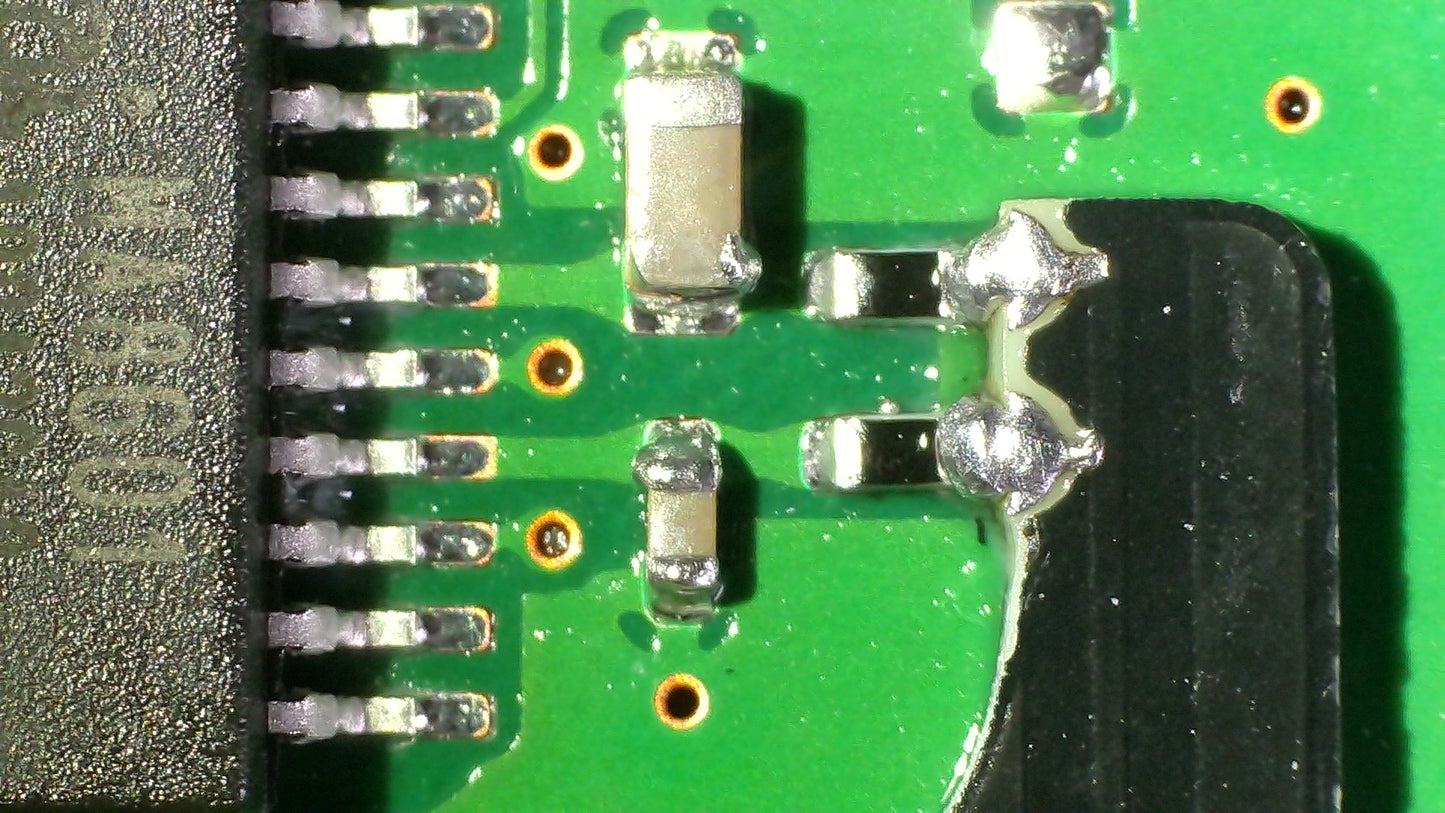
2: First align the storage board's edge mounts to the copper plane of the Mini's mainboard. At the same time, align pin 6 and 7 of the chip next to the middle arm of the storage board, while also aligning the two resistors to the right arm of the storage board. See pictures.
3: Tape down board with kapton tape when you have all three sections aligned.
4: Solder the edge mounts to the copper plane. Be sure to use plenty of flux and apply plenty of heat as well. You want this to bond correctly, otherwise the board can slip off. Be generous on the flux. The better your solder, the better you'll get a bond. You can also use Solder Paste for this if you wish, just leave the iron to apply enough heat. Check to see if you have a solid connection before continuing.
5: Solder the middle arm by soldering the top pad to pin 6 and the bottom pad to pin 7. Use LOTS of flux here. Apply heat to the pad and slowly feed it some solder. Let the solder flow down to the pin until you have a solid joint for both pins to pads. Take your time and avoid bridging the pins with too much solder.
6: Solder the right arm with the same method onto the resistors and clean up after you have finished this step.
MicroSD Card Setup:
1. Format card to FAT32
2. In Hakchi, click Export to USB. This will properly setup your card to be read.
3. Insert MicroSD into the storage board you just installed.
4. Connect mini to your pc. You will now notice your new storage capacity. You can now freely sync your mini when connected to the pc. No need to remove the card anymore.
Share